# Creating a New DealRoom
# Steps to Create a DealRoom
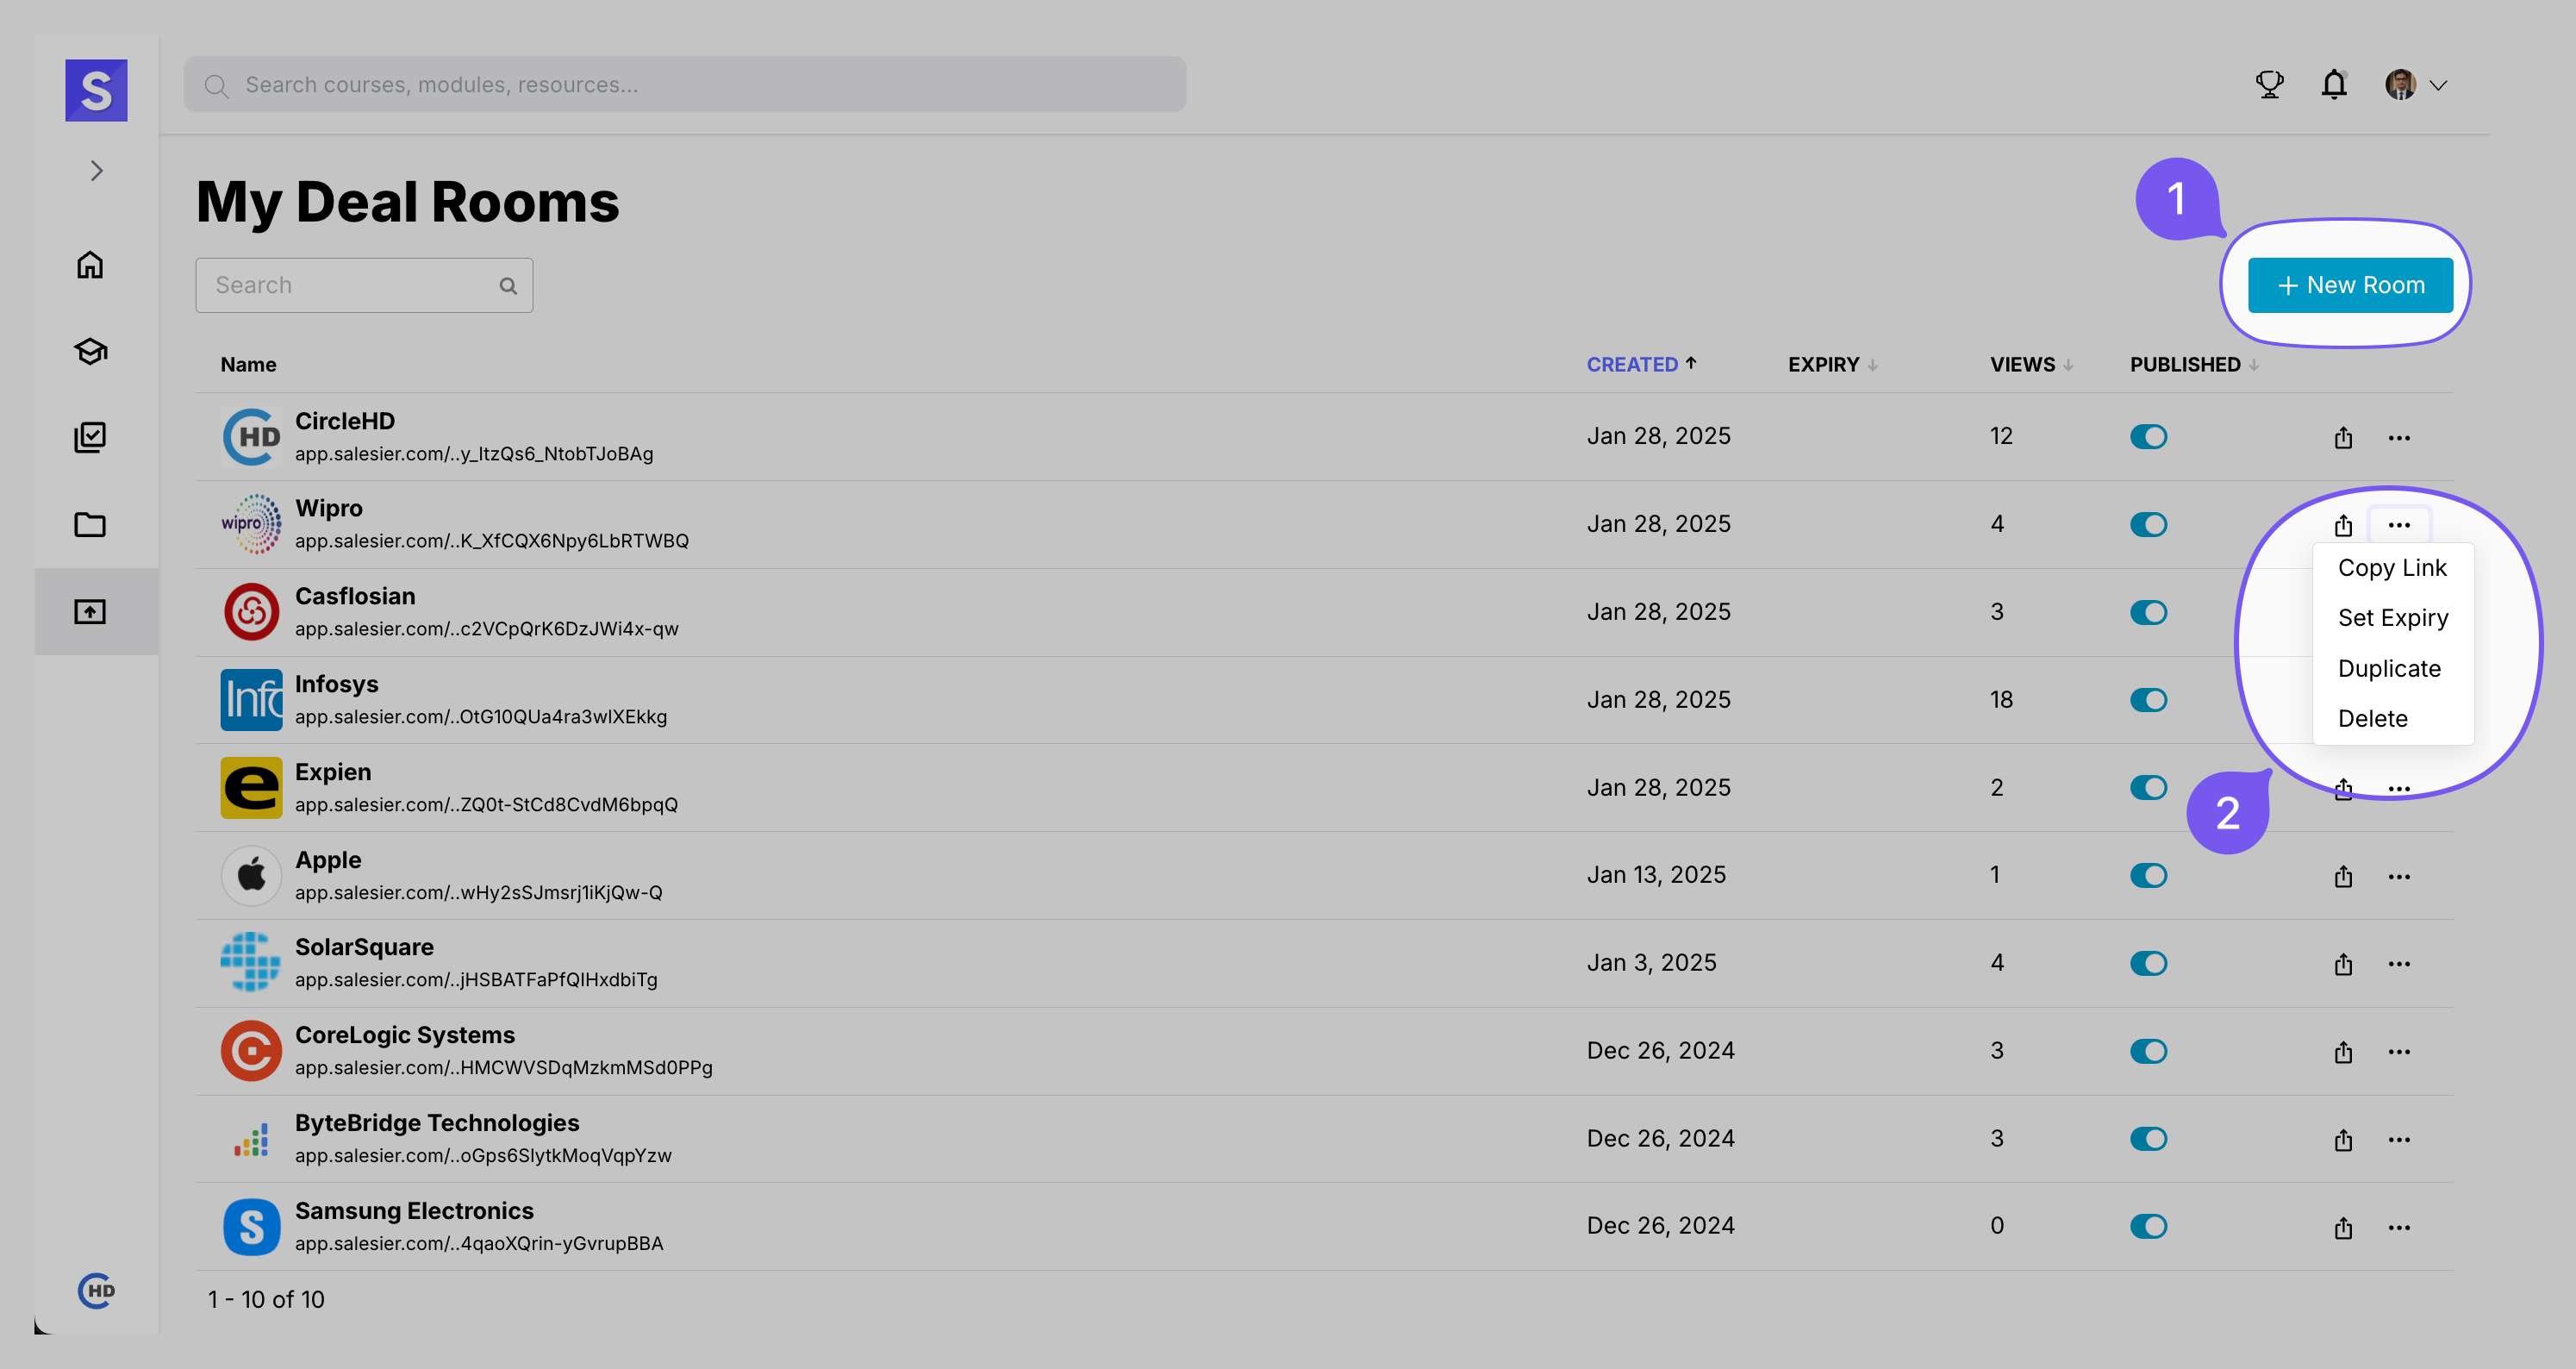
Click the + New Room button.
A New Room pop-up window will appear.
Enter the following details:
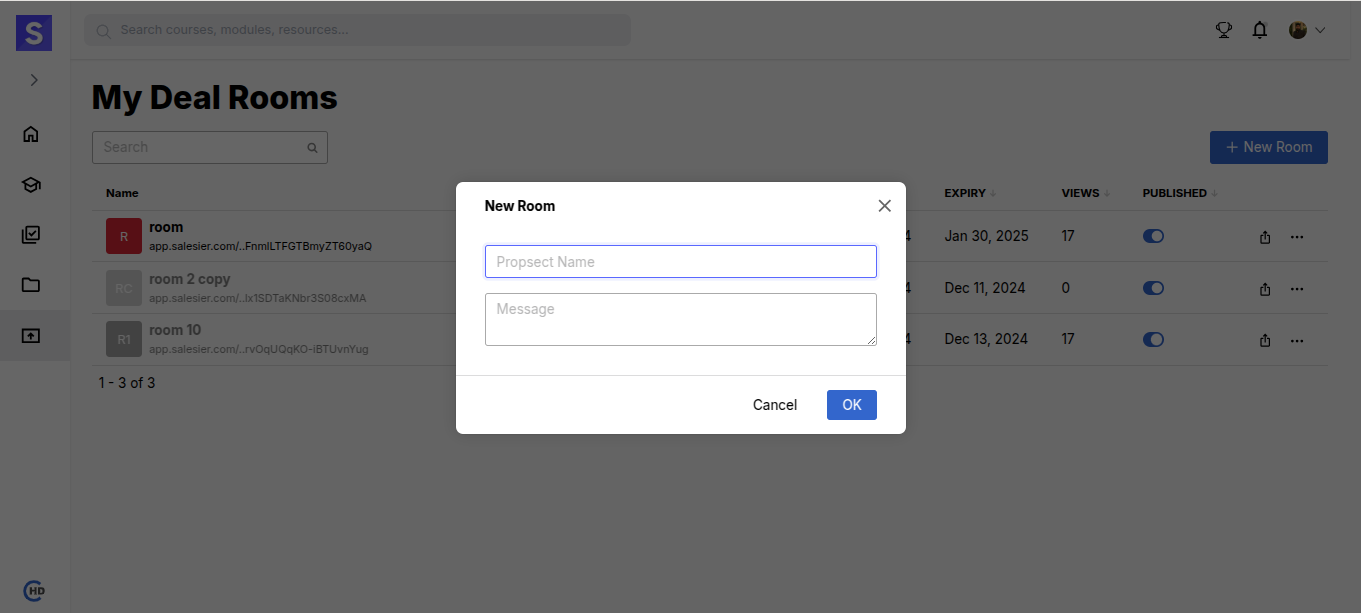
- Prospect Name: Enter the prospect’s name.
- Message (optional): Add any relevant notes.
Click OK to create the DealRoom.
# Editing a DealRoom
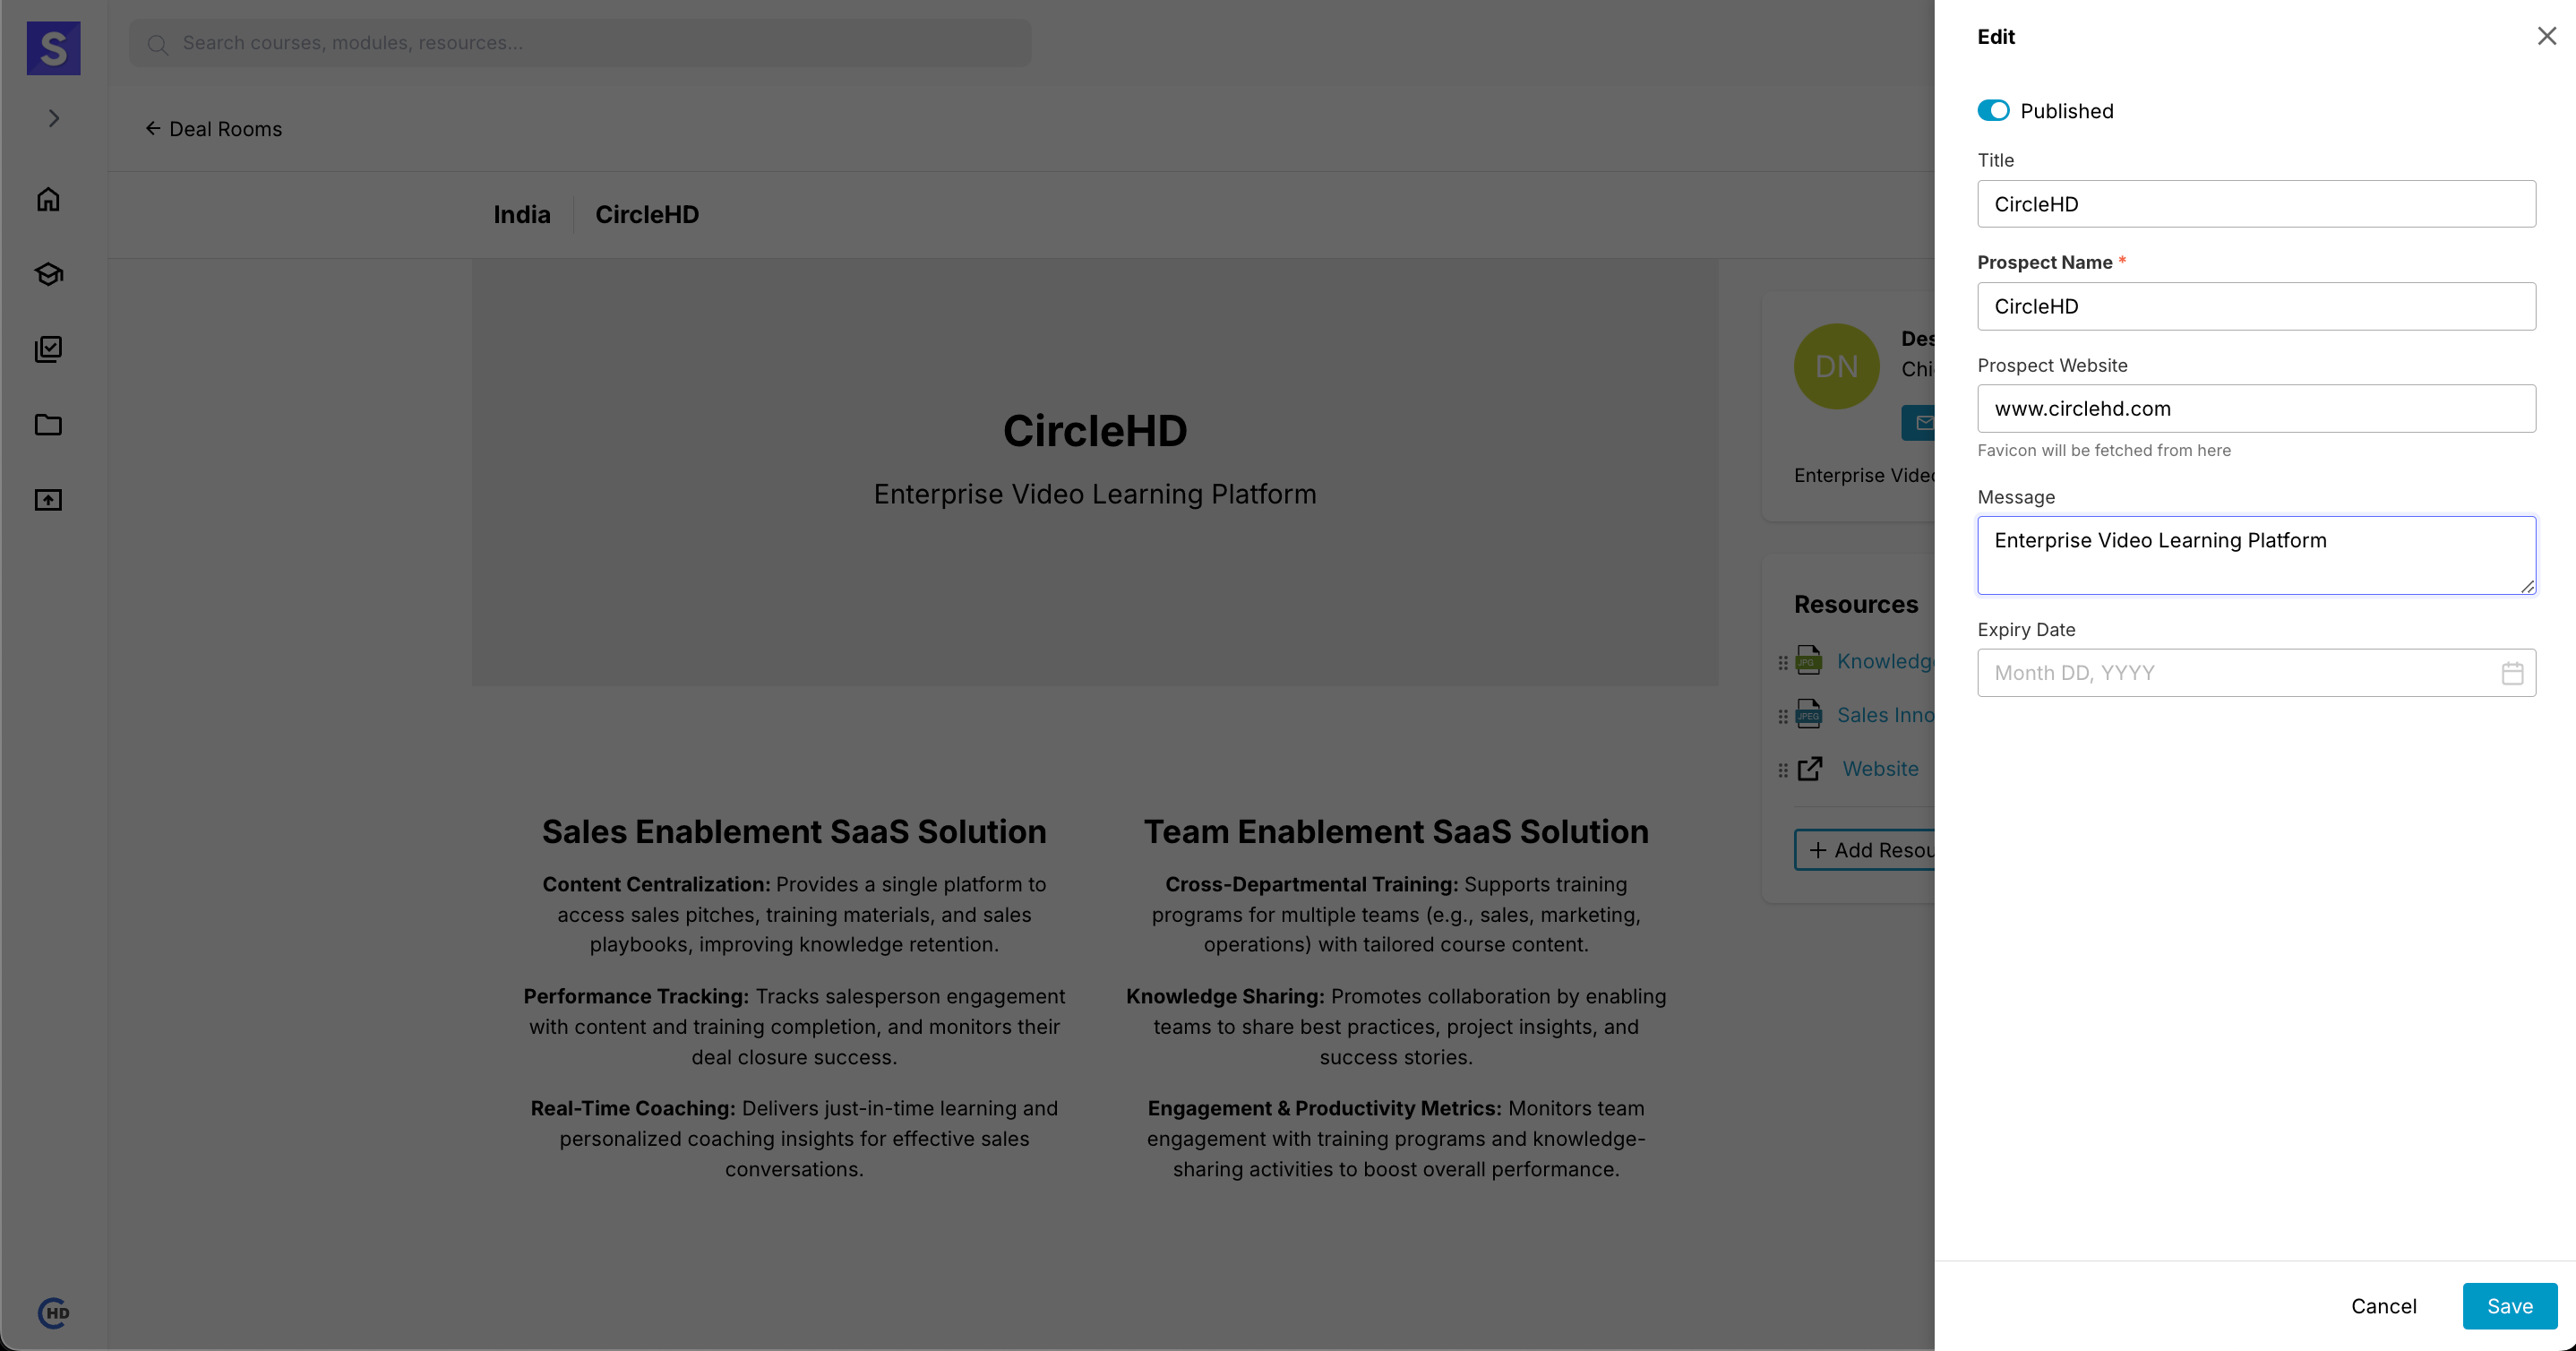
Once the DealRoom is created, you can update its details:
- Title: Modify the DealRoom’s title.
- Prospect Name: Update the prospect's name.
- Prospect Website: Enter the website URL, and the system will automatically fetch and apply the website's logo.
- Message: Update the DealRoom description or notes.
- Expiry Date: Set or update the expiration date for the DealRoom.
Click Save to apply the changes.
# Adding Content to a DealRoom
# Using Pre-Defined Structures
# Steps to Add Content
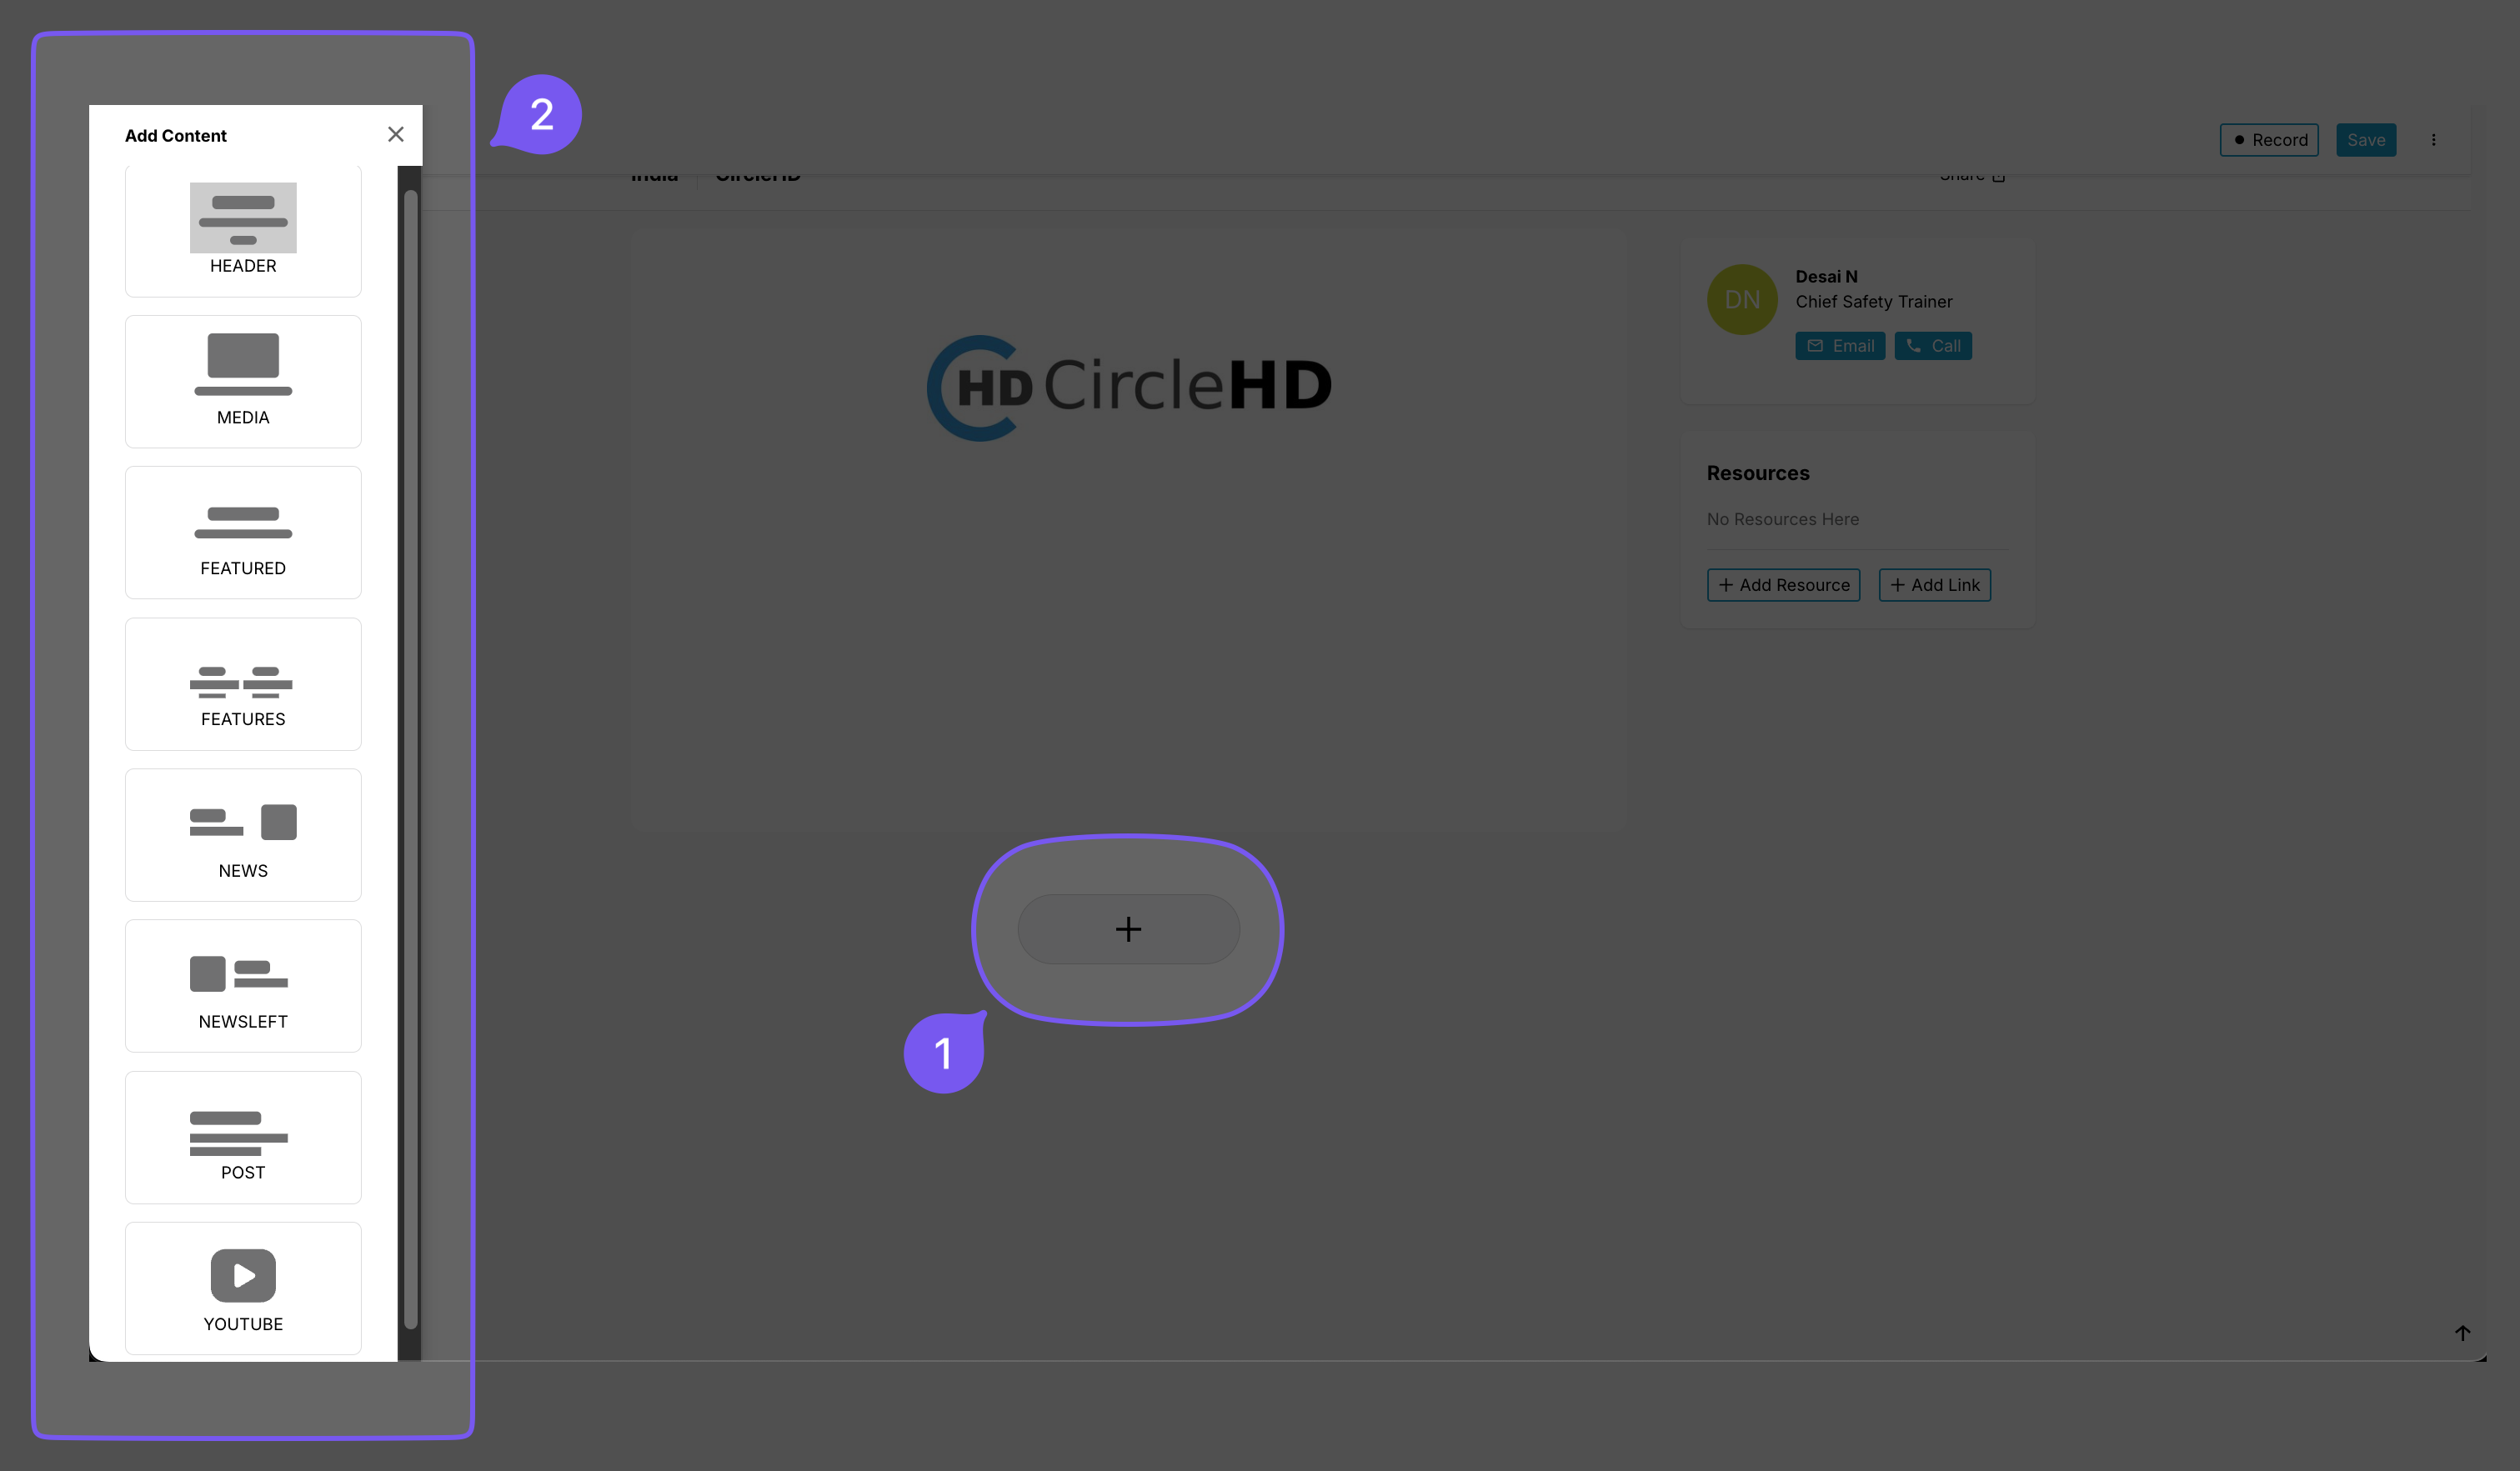
Click the "+" button located in the center of the screen.
A sidebar labeled "Add Content" will appear on the left.
Select the type of content you want to add from the available options:
- HEADER: Adds a section header.
- MEDIA: Inserts images or videos.
- FEATURED: Highlights specific content.
- FEATURES: Adds multiple featured items.
- NEWS: Displays news-related content.
- NEWSLEFT: Places a news section aligned to the left.
- POST: Adds a new post.
- YOUTUBE: Embeds a YouTube video.
# Notes
- Clicking on any content type will add it to the workspace.
- You can edit, rearrange, or remove the content after adding it.
- Use the Save button in the top-right corner to apply changes.